Retrofit PDC Front + Rear POLO 6R
Retrofit PDC Front + Rear POLO 6R
Introduction
Hello all ! This is my first post at Motor-Talk and I will introduce myself shortly:
My name is Hans and I live in the Netherlands. My job is Mechanical Design Engineer. I like to do retrofitting all kind of stuff on cars. I did several mods on my Passat B6 and on my friends Golf VI. Until now I only did what others found out but for the latest mod I did on our Polo 6R was something new. As far as I know PDC on Polo 6R at FRONT has never been published before and was not available as an option to order from VW. That’s why I started this post.
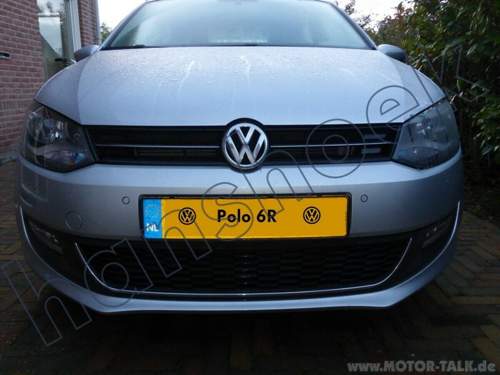
The PDC on Polo 6R was not ordered with this car at all, and as I am used to it on my Passat (front and rear) I wanted to have the same on the Polo. I ordered a set from “Carssystems.PL” which came in a few days. The set consisted of: sensors in the car colour with sensor holders, wiring, connectors, electronic module, switch and an installation manual. The manual was very poor and did not cover front bumper installation. Also the switch was not usable, this I will explain in the interior section.
THIS GUIDE IS A REPORT OF HOW I DID IT. IF YOU WANT TO DO SOMETHING SIMILAR IT WILL BE AT YOUR OWN RISK AND I WILL NOT BE RESPONSIBLE IN ANY WAY !
DISCONNECT THE BATTERY BEFORE DOING ANYTHING TO THE ELECTRIC SYSTEM OF THE CAR!
The sensor holders from Carsystem.PL come in 3 types: flat, flaw bend, a bit more bend. As the car is symmetrical I don’t understand I received an uneven number of the various types? After I completed therear bumper I decided to use original VW for the front. I did it because the uneven number of types I received but more because the sensors stick out of the bumper. See section “results”. I used Sensor holder 3C5 919 491 N + Tape: 3C0 919 939 (these are suitable for the almost flat sections of the bumper, and can be used for all 4 sensors in the front bumper). I used in 2 positions the ones with red tape (these were left over from a Passat project) and are with a flaw bend; in my Polo it is okay, but the others fit better.
For people who are interested in the original Polo sensor holders I added a picture with part numbers. Be aware of the placement: I think these will need 2 component glue to fix, instead of the double adhesive tape from “Carsystems.PL” or the Passat types I used. Otherwise the sensor may not be equal to the bumper outline surface.
For the hole making I pre-drilled from the inside first ø3mm and then ø9.5mm. Then I punched ø18.6 mm with a tool from “Greenlee”. The punch tools are also available from “Q-Max” (Google is your friend ?). To create smooth edges on the visible (out)side you should punch from outside to inside.
I made an aluminium positioning tool as help to center the sensor holder in the bumper hole.
The CAN-wire should be twisted to prevent electronic interference. As delivered it was just straight. From my experience in machine designing I know it is general method to have a twisted pair of wires on bus systems. If you know the CAN bus that is used for the PDC is the most relevant one of all (POWERTRAIN) it is better to prevent problems. So I contacted “Carsysems.PL” for this and they replied: ‘It will also work this way’. I untied the wiring loom and twist the CAN pair myself, then tied the wires together again. This feels more comfortable for me!


Beste Antwort im Thema
Front bumper removal
According to the workshop manual it should be possible to leave the top grill into position, but I found it easier to remove it as well. The plastic is thin and breaks very easy, so my friend warmed it a little with a hair dryer. The head lights need to be taken out, after removing 2 bolts you can slide them frontwards with a small click.
The bumper itself is mounted with several (metal) screws in the wheel arches and on the bottom side. There are also many plastic snap connections, I indicated all of them in the pictures. 2 persons are required the take the bumper carefully of.


21 Antworten
Rear
In order to remove the rear bumper you have to loosen the interior trim, disconnect and to take out to tail lights (use the large plastic bolt). There are several screws to take out in the wheel arch and underneath to bumper. At last you have to unclick several plastic joint on both sides, better do this with 2 or 3 persons.
To get the wire from the sensors to the inside of the car you have to pull t into a narrow rubber grommet. I loosened the connector, got all the crimp contacts out of the plastic carrier and used some green soap as lubricant.
I placed the electronic module and the speaker on the cars chassis with “Taptite” M4 screws, predrilled with ø3.5mm. Pull the wire is over the inner wheel arch to the front, next to the back seat and the through tunnel underneath door step.
The positions of the sensor are indicated on the inside of the bumper.
The wiring must pass over the wheel arch, underneath the trim next to the back seat. From there it will go beneath the door step cover. The wiring to the front should be placed at the same time otherwise the section to the boot must be taken out afterwards.


Taking the wire to front
This part needed the most research (trial and error) because information was not available on the web. Apparently there aren’t many Polo’s with PDC at front. Maybe this article helps changing that 🙂.
After removing the wind screen wiper motor I decided not to pull the wire through the motor compartment because it was narrow and difficult to approach (see section not recommended). My alternative route was an opening next to the driver door, above the bonnet release lever. From here I draw it to the left wheel arch and further on to the front.
I removed the inner wheel arch and the trim to the door. The trim I had to adapt for letting through and attaching the wires. I removed the plastic cap in the chassis next to the driver’s door and replaced it with a grommet. Because the connector to the front wiring is relatively large and does pass the grommet. I had to work the other way around. I took the wiring apart and loosened the connectors from the module in the boot and drew these through the grommet.


Front bumper removal
According to the workshop manual it should be possible to leave the top grill into position, but I found it easier to remove it as well. The plastic is thin and breaks very easy, so my friend warmed it a little with a hair dryer. The head lights need to be taken out, after removing 2 bolts you can slide them frontwards with a small click.
The bumper itself is mounted with several (metal) screws in the wheel arches and on the bottom side. There are also many plastic snap connections, I indicated all of them in the pictures. 2 persons are required the take the bumper carefully of.
Front Sensors
The placing of the sensors in front is basically the same as rear, despite there is no indication for the sensor positions. Before adding PDC to this Polo I did another PDC (and PLA) project on a Golf VI. The positions next to the number plate should be more or less the same. Coincidentally this was very convenient for the Passat sensor holders I intended to replace the original (in this case not really original 🙂) ones that came with the set. I ‘measured’ the curve of the bumper at sensor position by cutting thick paper just as many times until it had a reasonable fit. With this piece of paper I found out the 2 middle sensors of my Passat on the rear side should fit on the Polo. So I looked up the number, ordered them and guess what, they did fit!
Next thing was the placing side sensors. For the height I took the same as measured from the middle ones, next to the licence plate. So far the easy part. I did again some comparing to other car types as Golf; Passat; Audi A2-3-4-5-6 and on my Polo on the rear side. My conclusion was the right distance was the same as on the rear side. I marked it with a little white spot (see picture). Because it was close to a visible line from mould, I placed it over there. In this way it was easy to mirror the position to the other side.
With the sensors ready (too bad I forgot to make a picture) you have to be careful to put the wire in place when mounting the bumper. To prevent rattling and have the connector proper fixated I paced it on a bracket, made from a clip.


Interior
First of all I started with the fuse. The cable has already the right crimp connector for a mini fuse. The fuse box comes out more easy if you remove the air duct first. The fuses are fixed with a purple plastic retainer that has to be shifted with help of a screwdriver. Choose a free position, I put the connector in nr. 16 and later on it completed it with a 5 Ampere fuse.
Then the CAN. According to the manual the module at the steering wheel should supply the CAN. As this was difficult to approach I decided to extended the CAN cable (Twisted !) and soldered it to the wiring from the airbag unit. It is located next to gas pedal, in the centre console. The Orange wire connects to CAN High, pin 49, orange-black and brown to CAN Low, pin 50, orange-brown. I isolated it nicely and then put it back.
Then the front-speaker needed a spot, so I took out the ventilation outlet and side plate of the dashboard. These are click-in, and just as easy to click-out. Then I bolted the speaker onto a plastic member in the inner dashboard frame.
The switch that was supplied gave some questions. I ordered the system for a Blue Motion Polo with start-stop. So I received a button has a start-stop sign and a PDC sign. I thought this would have a double function and should replace my original switch. At first sight this looked like it made sense. When I had a look at the connections and inside of both switches they appeared to differ only of the image at front. Maybe the switch can have a double function, for example pressing short or long will make the difference between start-stop or PDC? I did not test. Anyway there is only one light in the switch (except for ambient illumination), so it did not satisfy me. Contacting ‘Carsystems.PL’ wasn’t helping either. They wanted me to send the whole set back and refund me the money. While I had the cable and rear sensor already placed!
I found a solution at Pimpowski, using and adapting a Skoda switch. For my Polo the switch and cover needed to be black, part numbers are: 3U0 919 281 5E2 for the switch and 3U0 963 341 47H for the cover. My switch had already a red led, there was no need to replace it, only reverse the polarity. I did some micro soldering (!) Maybe the result looks not so beautiful, but never mind: it works! The cover is original intended for a curved surface, so a flattened it bit and then it fits.
You can also find info how to converse switches on Passatplus.


Not recommended
In this section a placed some pictures of the steering wheel where the CAN should be taken from, according to the manual. As you can see there is not much room and I took the CAN to a different place (see interior section).
There are also pictures of the main wire from interior to engine compartment. This was not described at all in the manual. It looked complicated and seems very narrow on the cabin side, so I routed the wire to the front sensors alternative way (see section wire to front).


Final results and conclusion
At final stage I coded the module with VCDS. It should be added on address 10 and several settings can be changed. With long-coding-helper and modifying parameters in some documented channels it should not be a problem.
Considerations:
Pro’s
Original look
Reasonable price
Wiring pre-manufactured
Con’s
Switch was extra work
Poor manual and support
Sensors stick out bumper surface
Sensor holders look and feel inferior to original VW
CAN cable not twisted
Conclusion:
A very recommended mod! 😁😁😁
I was very happy to have the PDC completed and it works very well. It was a lot of fun installing it. Now the Polo has a valuable option and driving is much more luxury by now.


Perfect!!!!!
Fantastic! Have you used 8 x 1S0 919 275 (sensors normally only used in the rear) both for front and rear?
What about the PDC/OPS module? What part no. is that?
Hello disko boy,
I dont know the exact number of the sensors as i bought it in a set. Is it for an UP? the article nr look like so.
My module is "7E0 919 475 L", as you can see on the picture.
Do you plan to build it in also?
Good luck
Hans
hello
Please you have the coding module ?
thank you
Hello Wamba,
For your information I enclosed the scan data.
The longcoding of vcds and the adaption help will guide you.
Please be aware that you have to fill something in the radio as well to display the sensors on the screen. In my situation this was not necessary.
I hope this will help.
Good luck,
Hans
-------------------------------------------------------------------------------
Address 10: Park/Steer Assist (J446) Labels: 7E0-919-475.clb
Part No SW: 7E0 919 475 L HW: 7N0 919 475
Component: PARKHILFE 8K H06 0106
Revision: -------- Serial number: 28231307404820
Coding: 108001
Shop #: WSC 12345 111 12345
ASAM Dataset: EV_VW75XParkAssis8K 001003
ROD: EV_VW75XParkAssis8K.rod
VCID: 3B7F2935B27E811
No fault code found.
-------------------------------------------------------------------------------
thank's
Hello Hans,
old subject already but I start with this right now and I was wondering if you could share front sensors positions/distances between them as the original bumpers don't have marks inside.
Thanks in advance for your reply.